Felt headbands and finger puppets

So I had this idea to give Ria’s classmates headbands for girls and finger puppets for boys this Christmas.  Since I will do felt this Christmas, I decided to make felt pouches and wallets for our other friends too.

So I bought yards of different colored felt cloth worth P120/yard at VC Trading in Farmers Plaza.  I also bought google/moving eyes, different ribbons and buttons to accentuate the headbands.

Here are the final products (though I was not able to take a picture of all the products)

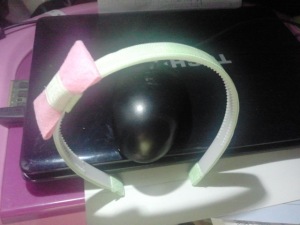
my first creation

my first creation

different designs

different designs

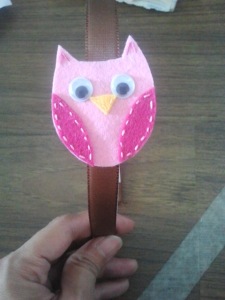
owl! :)

owl! 🙂

lovely star

lovely star

flowers

flowers

yummy ice cream!!!!

yummy ice cream!!!!

my brand: Oliswle

my brand: Oliswle

I put a ribbon on the headband to serve as the base color then I just added different designs, whatever I felt doing that time.  I also made different templates and patterns both for the headband and puppets.

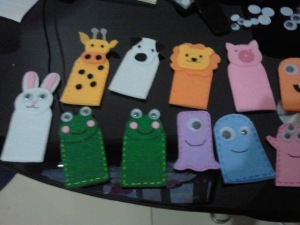
For the puppets, I made cute monsters and animals for the boys.  Here are the products:

animal and monster puppets

animal and monster puppets

More monsters and animals!

More monsters and animals!

All of them were hand-sewn using DMC threads.  I made sure I used darker colors for light felt cloth to serve as design but for some, I just used the same shade.  The animal eyes were black glass beads (the round ones) since our puncher has big holes and the google eyes are very big for them.

I tried to search for different cute monsters as my guide but as I go along with my sewing, I just scribbled some shapes and put eyes and mouth to make them monsters.  It’s fun!  The ideas are endless from color to mouth to eyes.  I enjoyed doing the puppets 🙂

Prices:

Google eyes small: P3/5 pairs

Google eyes big: P5/5 pairs

Ribbon (ribbed): P5/yard

Ribbon (plain, 1/4″): P1/yard

Headbands: P6/piece

Buttons: P8/12pcs

DMC threads: P15/color

Printing of tag: P7/page (a bit pricey but there are other shops that offer cheaper printing services)

Puncher: I’m sure you have one at home 🙂

Felt cloth: P120/yard

Good luck! 🙂

Handmade invitations: Minnie Mouse

I wanted to personalize my daughter’s birthday invitations for her classmates.  So I searched for minnie mouse invitations to have an idea on what to do.  I combined all the things I saw.  So here’s the product of my research.

Materials

I bought some brown cartolina (or cheap board may also be used) as the base of the card.  I planned to have a folded invitation, just like a normal birthday card.  I also bought black cartolina for minnie’s silhouettes, different patterned gift wrapper (some of which were in my stock already), pink and white polka gift wrapper (for minnie’s ribbon and pouch), colored paper (I bought this months before intended for Ria’s home art activities), pink boards (to border minnie’s silhouettes), abaca fiber (for name tags), colored pens (a little gift for the invitees), pink ribbon (for minnie’s ribbon) and a compass (for circles).

I also printed the party details, names, and tracing names as well as minnie’s silhoutte templates.  I assembled first the base card to know how big the templates should be.

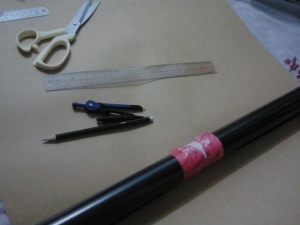
base materials, cheap board/cartolina, black cartolina for minnie silhouette, compass

base materials, cheap board/cartolina, black cartolina for minnie silhouette, compass

minnie silhouette templates

minnie silhouette templates

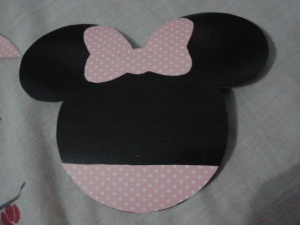
Using the mickey/minnie silhouette template, I traced it on black cartolina and minnie’s ribbon and pouch on the pink polka dots wrapper.

sample minnie cutouts

sample minnie cutouts

Then assembled them like this.  I put some glue on the border of the pouch only to give space for the party details.

assembled silhouette

assembled silhouette

I cut some patterned gift wrappers and plain colored papers for the front page design.  I wanted it to be like a scrapbook.  They’re just few inches in size.

scrapbook materials for design

scrapbook materials for design

I traced smaller templates of mickey on the black cartolina and pasted them on the pink board.  Then I cut the mickey’s to have these:

minnie mouse silhouettes for front page

minnie mouse silhouettes for front page

I assembled the patterned wrappers, colored papers and minnie’s.  I put a ribbon on mickey’s silhouette to make it look like minnie.  I just tied the ribbon at the center and pasted the whole thing on a white board.

assembled front design

assembled front design

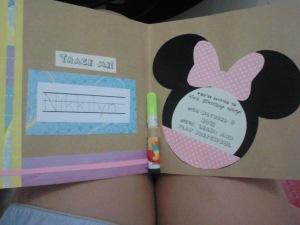
Next, I cut the party details in circles to fit the minnie pouch and inserted the cutouts to each pouch.  The pouch was glued to the right fold of the card.

invitation message

invitation message

Then I cut the names for tracing and pasted them on a patterned paper.  I just designed the left side of the fold as simple as possible to avoid crowded page.  I cut the center to create a pen holder and inserted the colored pens I bought.

center fold

center fold

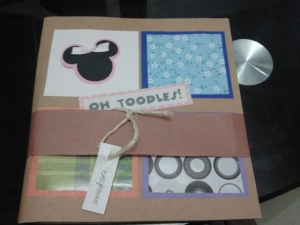
As finishing touches, I glued the “Oh Toodles” sign at the center of the card with pink polka wrapper border.  Enclosed the invitation by a strip of brown or black paper and tied the name of the invited guest.

finished product

finished product

Here is the whole batch of invitations.  I also gave her teachers their own invitations. 🙂

batch

batch


Good luck on your invitation-making! 🙂